
It’s kickoff day for the Neckwear Knit-a-Long with Knitter’s Pride!
Here’s the awesome plan!
WHERE
Join the fun by sharing your photos in the Knitter’s Pride Ravelry Group and on Instagram using the hashtag: #kpchauKAL
PRIZES!
Prize #1 Buy a pattern
Purchase any neckwear pattern using the coupon code neckwearKAL15 by July 31 and you’ll be entered to win a Nova Platina Deluxe Needle Set!
Prize #2 Post to Instagram
Post a photo on Instagram of your KAL progress using #KPchauKAL and you’ll be entered to win a Marblz Fixed Circular knitting needle. We’ll choose a winner on Friday, July 31.
Prize #3 Start a project page on Ravelry
Start a project page and use the tag KPchauKAL and you’ll be entered to win a Marblz Fixed Circular needle. We’ll choose a winner on Friday, August 14th.
Prize #4 Finish Your Project
Post a photo of your finished project by August 21, 2015 in the Ravelry KAL thread and you’ll be entered to win a Eucalan Gift Pack.
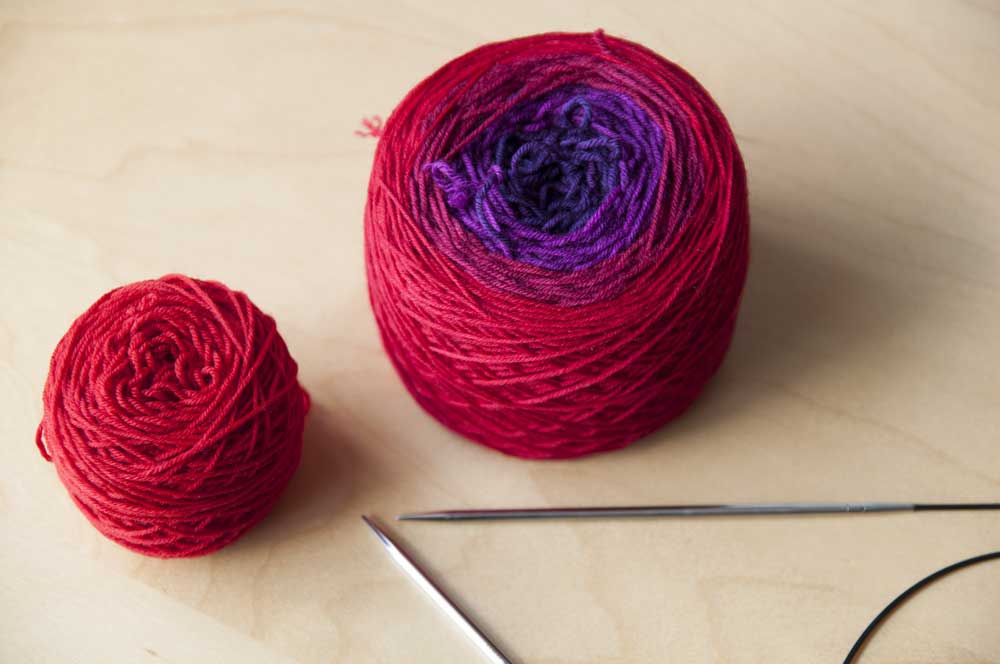
I’ll be knitting Just Enough Ruffles Light in this gorgeous Mountain Colors yarn gradient set, and I have a few tutorials to help you out as you knit.
If you’re not knitting this particular pattern and have an issue, feel free to post questions here on the blog or in the Ravelry thread – there are lots of helpful knitters there who just might help you out a little faster than I can!

Today we’ll be covering a really valuable method of working the Long-Tail Cast-on – an Infinite Long-tail cast-on! Lots of people love the traditional long-tail CO (myself included) but it can be a bit of bear to figure out how long of a tail to pull out of the ball, especially when working a CO of several hundred stitches. Working from both ends of a ball is a great solution – you never have to estimate how long of a tail and come up short (or way too long).
You’ll need a center pull ball of yarn – don’t worry, if you don’t have a ball winder, you can always wind a center pull ball by hand! If you’re using two different skeins of yarn, you can also use one tail from each ball. You can even use two different colours for a contrasting edge if you’re feeling fancy!
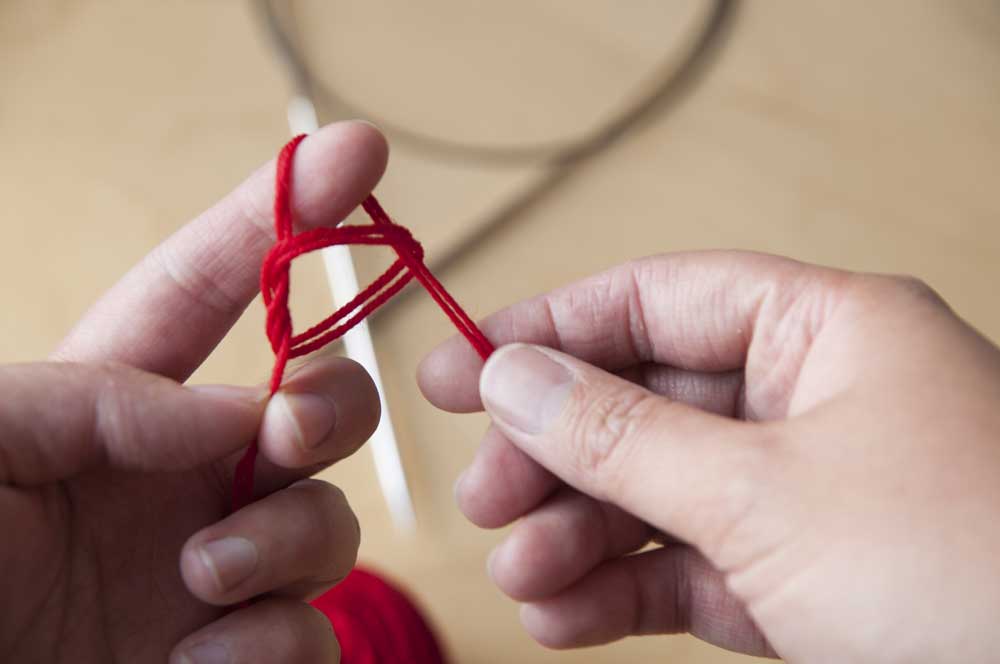
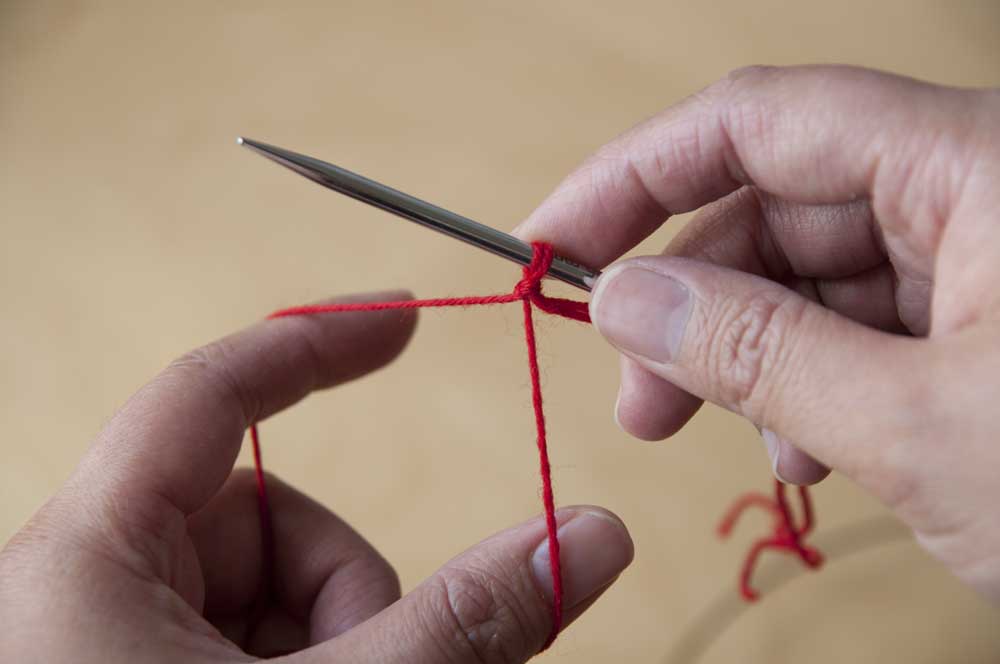
Pull out the ends of the ball (in this case it’s one from the inside, one from the outside) and hold them together to make a slipknot.
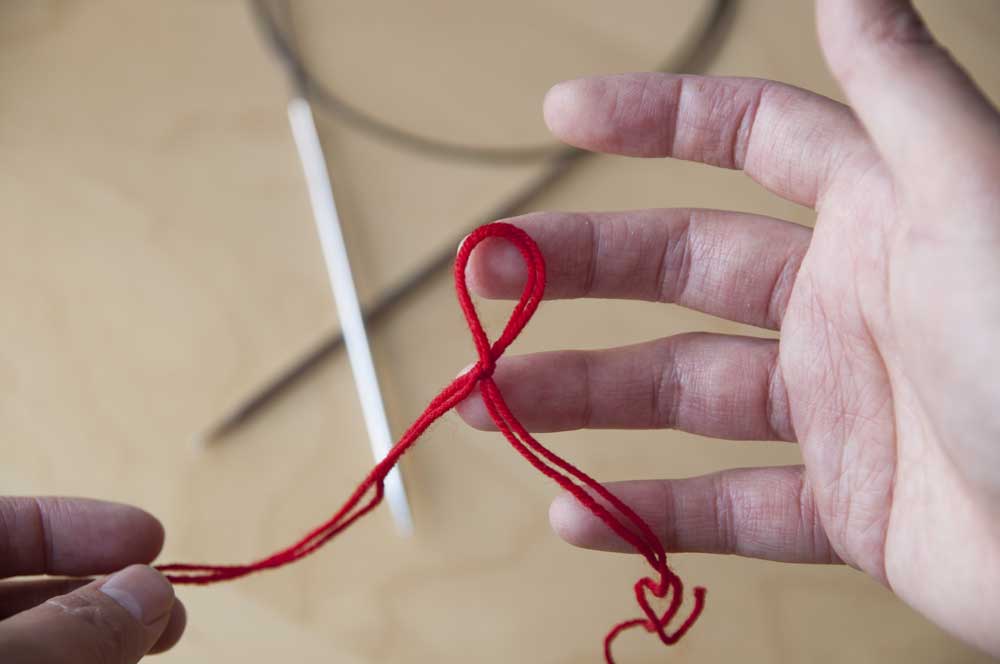
I usually count this doubled slipknot as the first cast-on stitch, though you can also choose to take it off the needle at the end of the first row of knitting, if you’re making something delicate where the doubled yarn will be apparent.
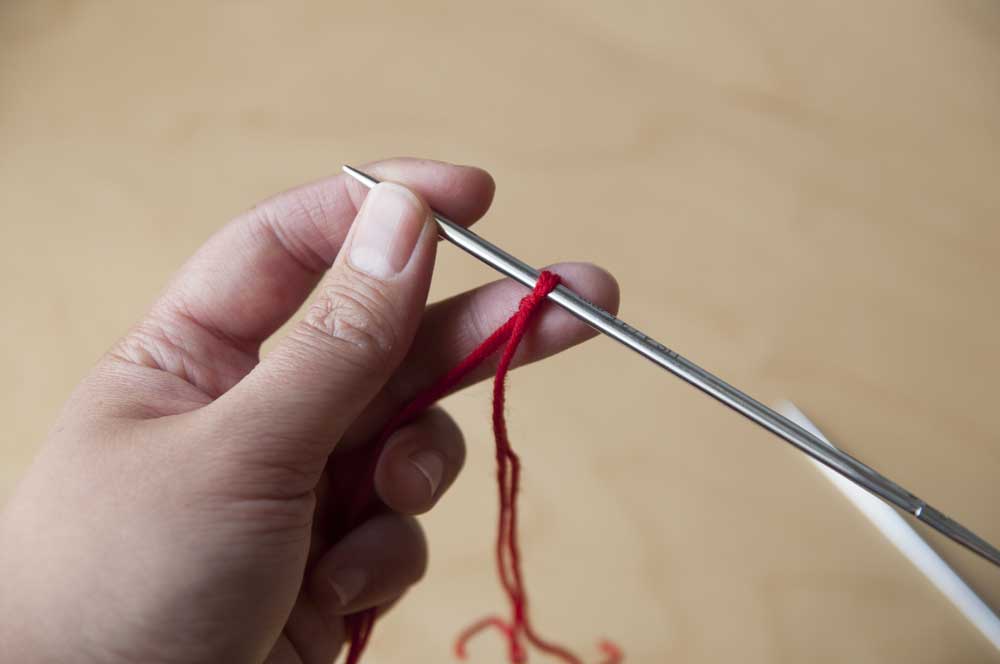
Put the doubled slipknot on your needles and tighten it up – I’m using the US 4 / 3.5mm tip and longest cord from my Knitter’s Pride Nova Platina set.
There are lots of long-tail cast-on videos out there I’m sure, so I’m just going to go through a little quickly! The two ends of the ball will now become your two tails. If you want to knit your project from the center of the ball, make sure that the strand coming from the *outside* of the ball is over your thumb. Create a ‘slingshot’ with the two tails.

Bring your needle up through the thumb loop from the outside…
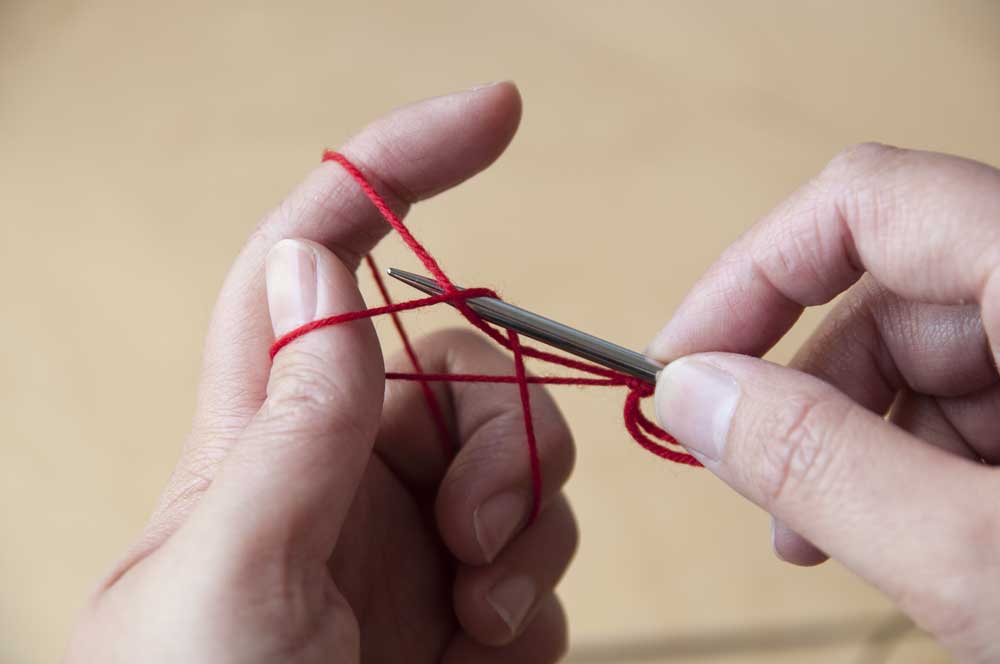
Up and over the inside index finger loop…
And draw through the center of the thumb loop.
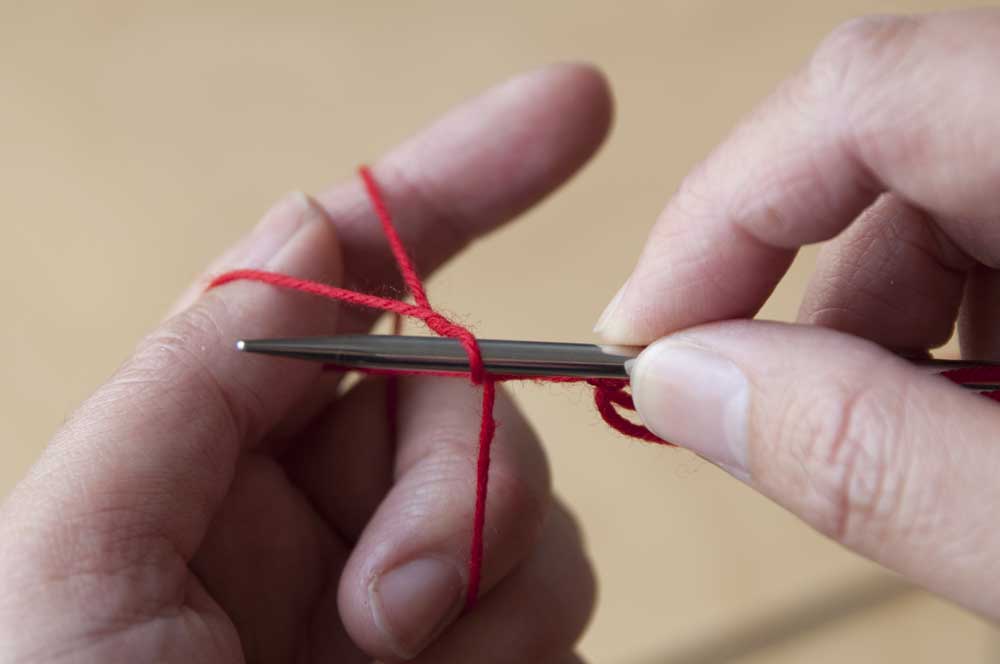
Take your thumb out of the loop and use it to snug up the stitch. You don’t want to tighten too much when you cast on, because it can produce a rigid, inflexible edge.

Sometimes the yarn can get a bit tangled when working this cast-on over a large number of stitches, or in very twisty yarn. Don’t worry too much about it, just let go of the tails every once in awhile to allow the twist to equalize itself.
You could also use this method of pulling from both ends of the ball to do a number of other types of long-tail cast-ons, like the German Twisted Cast-on or the Austrian Long-tail Cast-on.
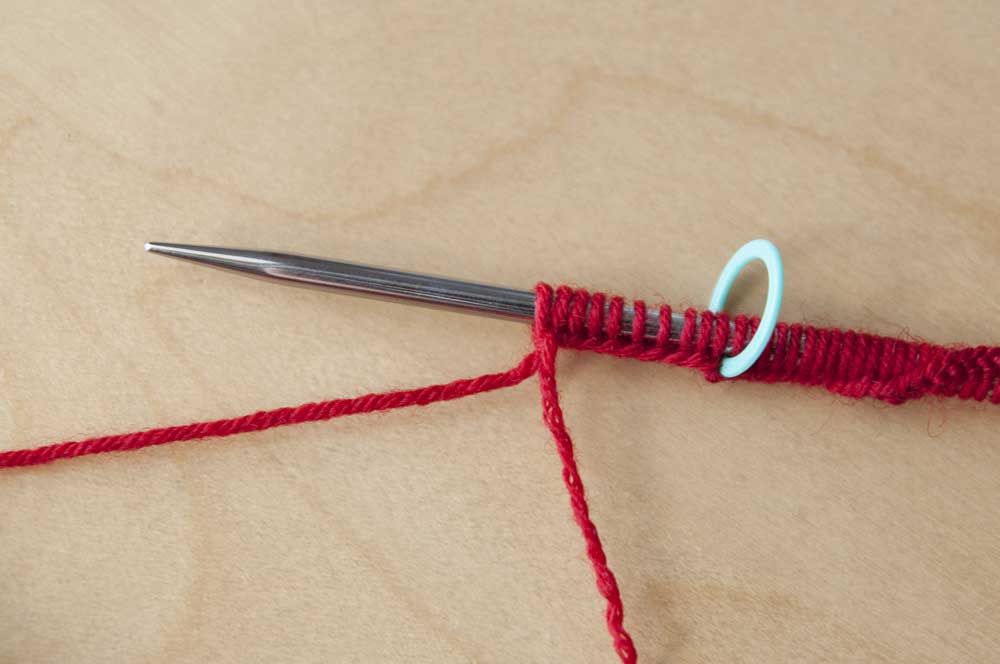
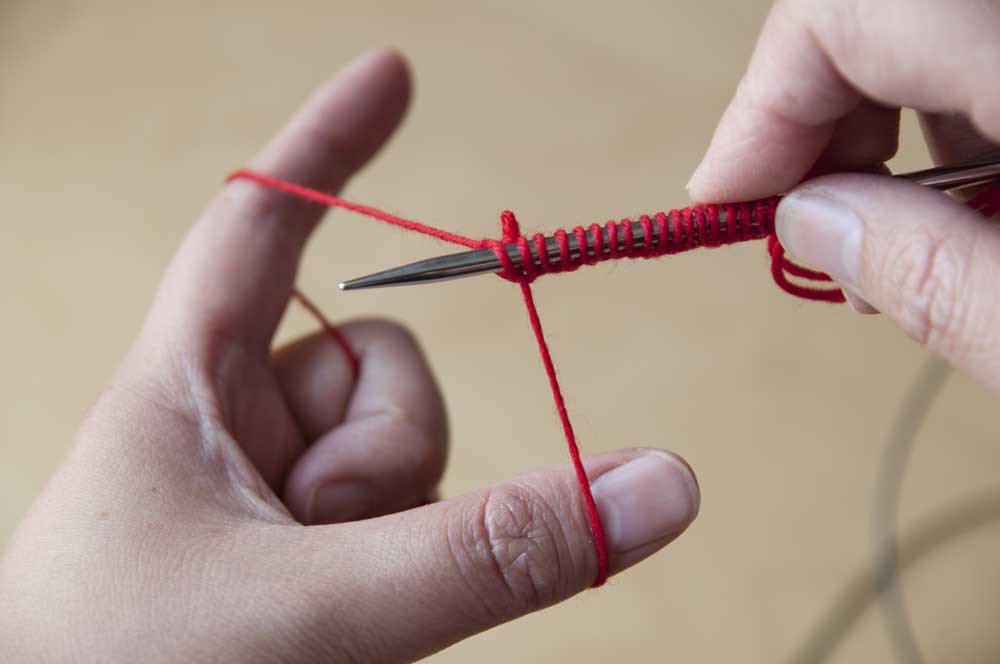
I like to place markers in as I go, every 25 or 50 stitches depending on how many I need in total. Just slip the stitch marker onto the right needle and keep casting on!
When you’re finished, cut the strand of yarn that was over your thumb – in this case, it’s the strand on the right of the photo above. Leave a few inches of tail for weaving in.
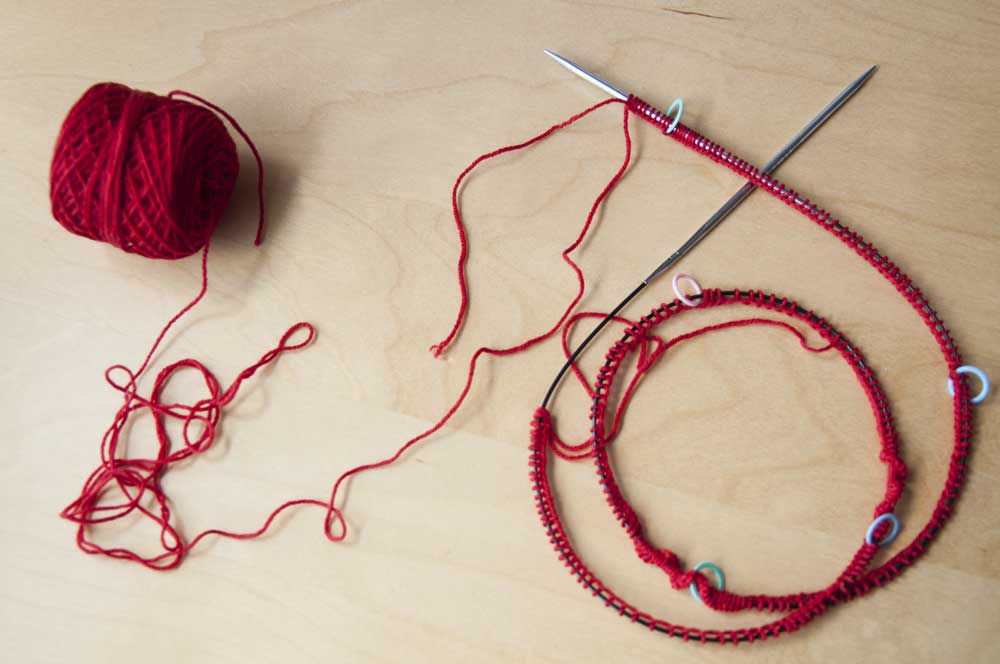
And that’s it! You can cast on 40, 100, 200+ stitches with this Infinite Long-Tail Cast-on and never have to worry about running out of yarn!
Don’t forget to use the Ravelry coupon code neckwearKAL15 for 25% all my neckwear patterns before July 31 to be entered to win an awesome interchangeable needle set!
See you in the Knit-a-long thread :)
Leave a Reply to Anne Cancel reply