
I love knitting (and designing) seamless sweaters knit from the bottom up. The body and sleeves are knit separately from the hem (cuff) to the underarm, where they’re united to form the yoke – the rows are long, but you get to decrease a lot! When you get to the Finishing instructions though, there’s a line that can be daunting to knitters unfamiliar with the construction:
Close underarms using Kitchener stitch.
-or-
Graft underarm stitches closed.
(or something to that effect)
Side note: What’s the difference between Kitchener stitch and grafting? Nothing really. They both refer to stitching together sets of live stitches to create a seamless join. I think grafting can also refer to joining bound off stitches (say two sets of shoulder stitches) in a mostly invisible way by mimicking the structure of knitted fabric, as opposed to mattress stitch or a straight seam like backstitch.
I know a lot of knitters have trouble getting that underarm join nice and neat without holes at the edges, so I thought I’d put together a tutorial on how I do graft underarm gussets! There are a few different variations out there, including working a three-needle bind off at the inside of the sweater rather than grafting, but with many, many sweaters under my belt I think I’ve got it down pretty well! I took these photos while I was finishing the blue sweater from my last post, which should be ready for release this month!
Click on any of the photos to see them BIG!
The Setup
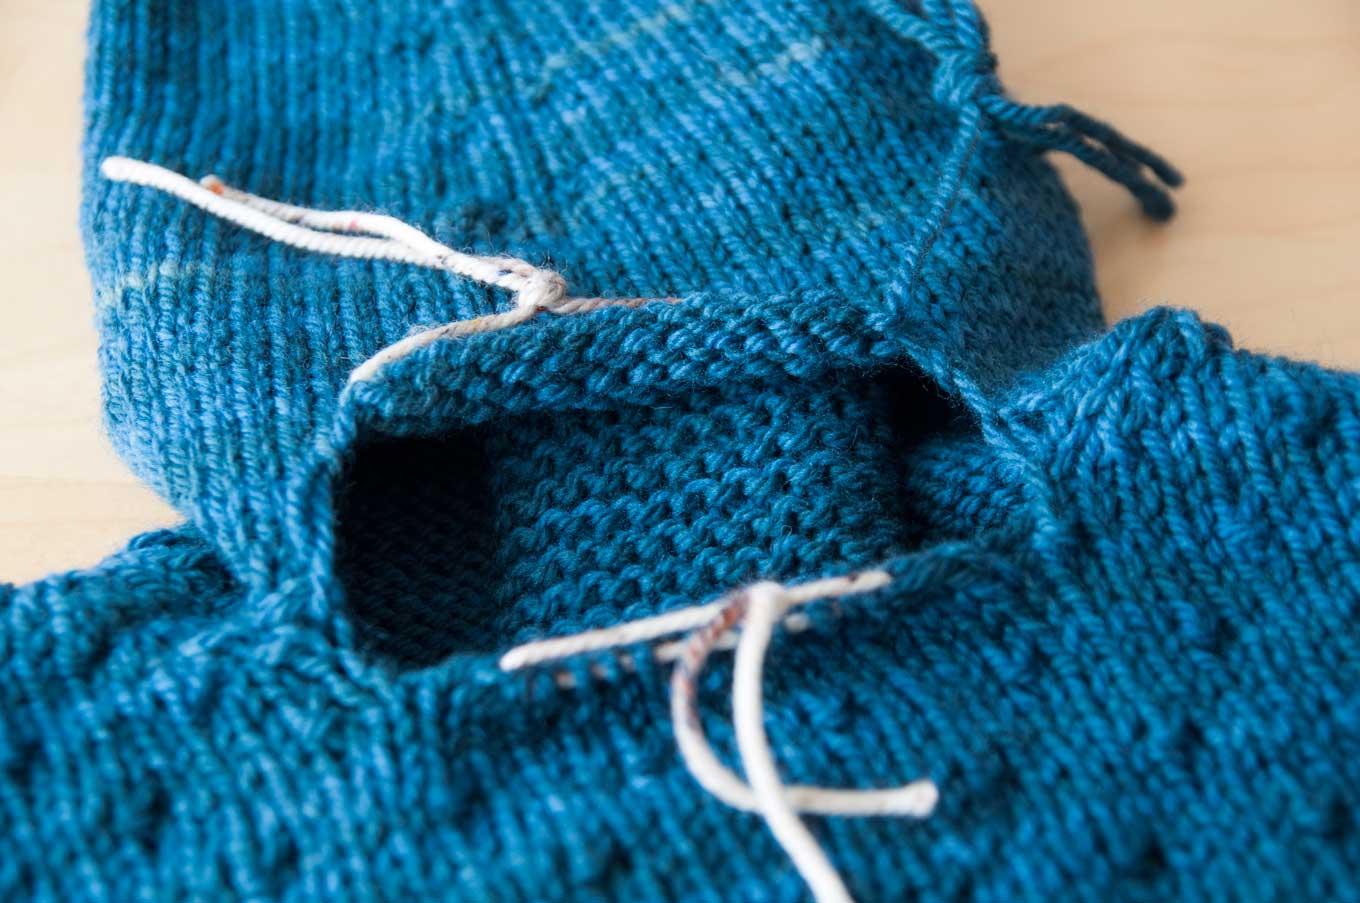
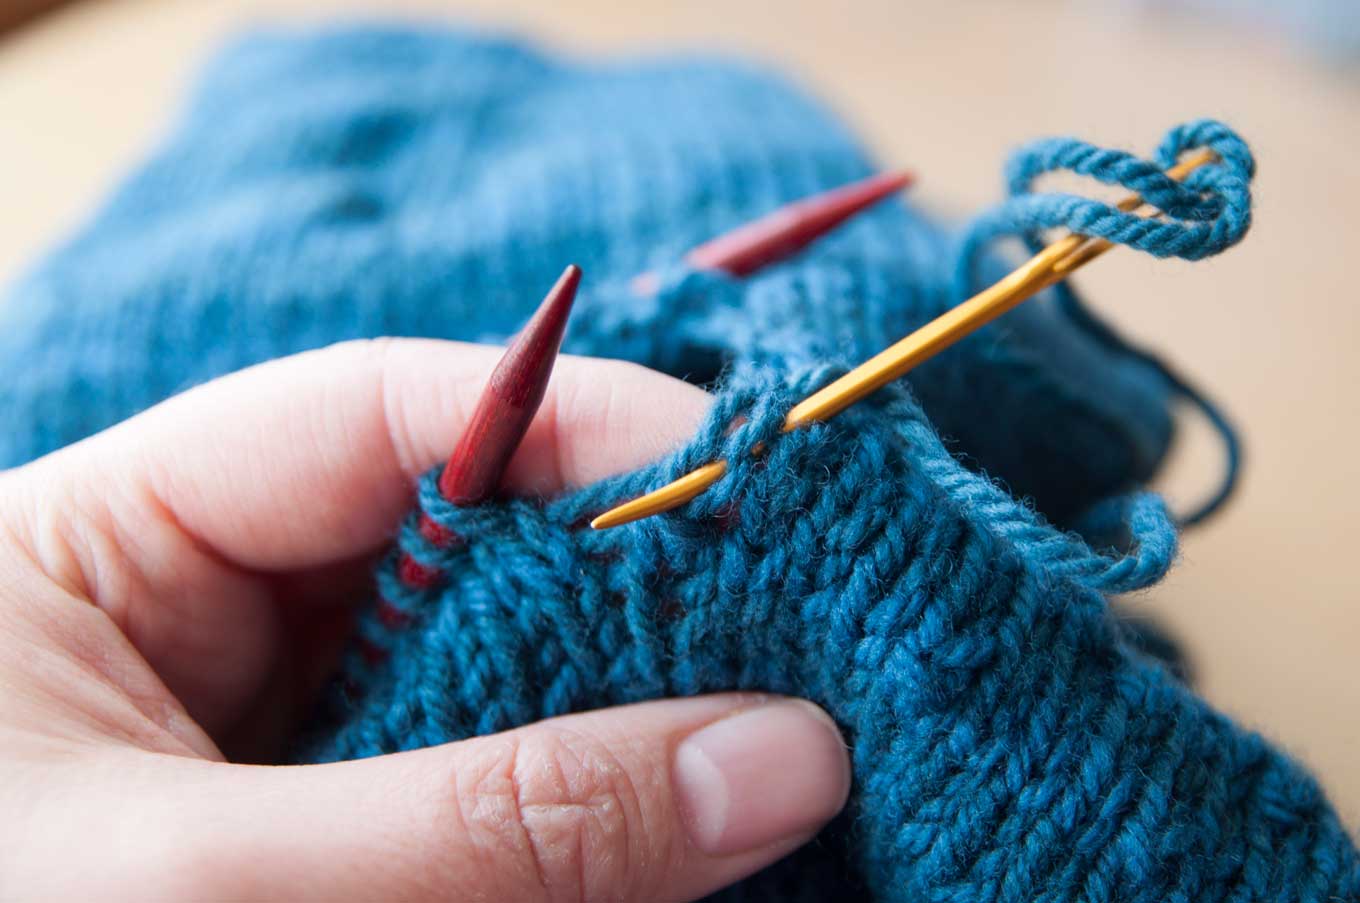
Here’s the before – the underarm gusset stitches from the arm (top) and body (bottom) have been held on scrap yarn, and I’ve left a tail from the sleeve to use for grafting. Arrange your knitting so that this tail is coming off the back right of the gap. The length of the tail will depend on how many stitches you have to graft, but 12-18″ is usually more than enough for an underarm gusset.
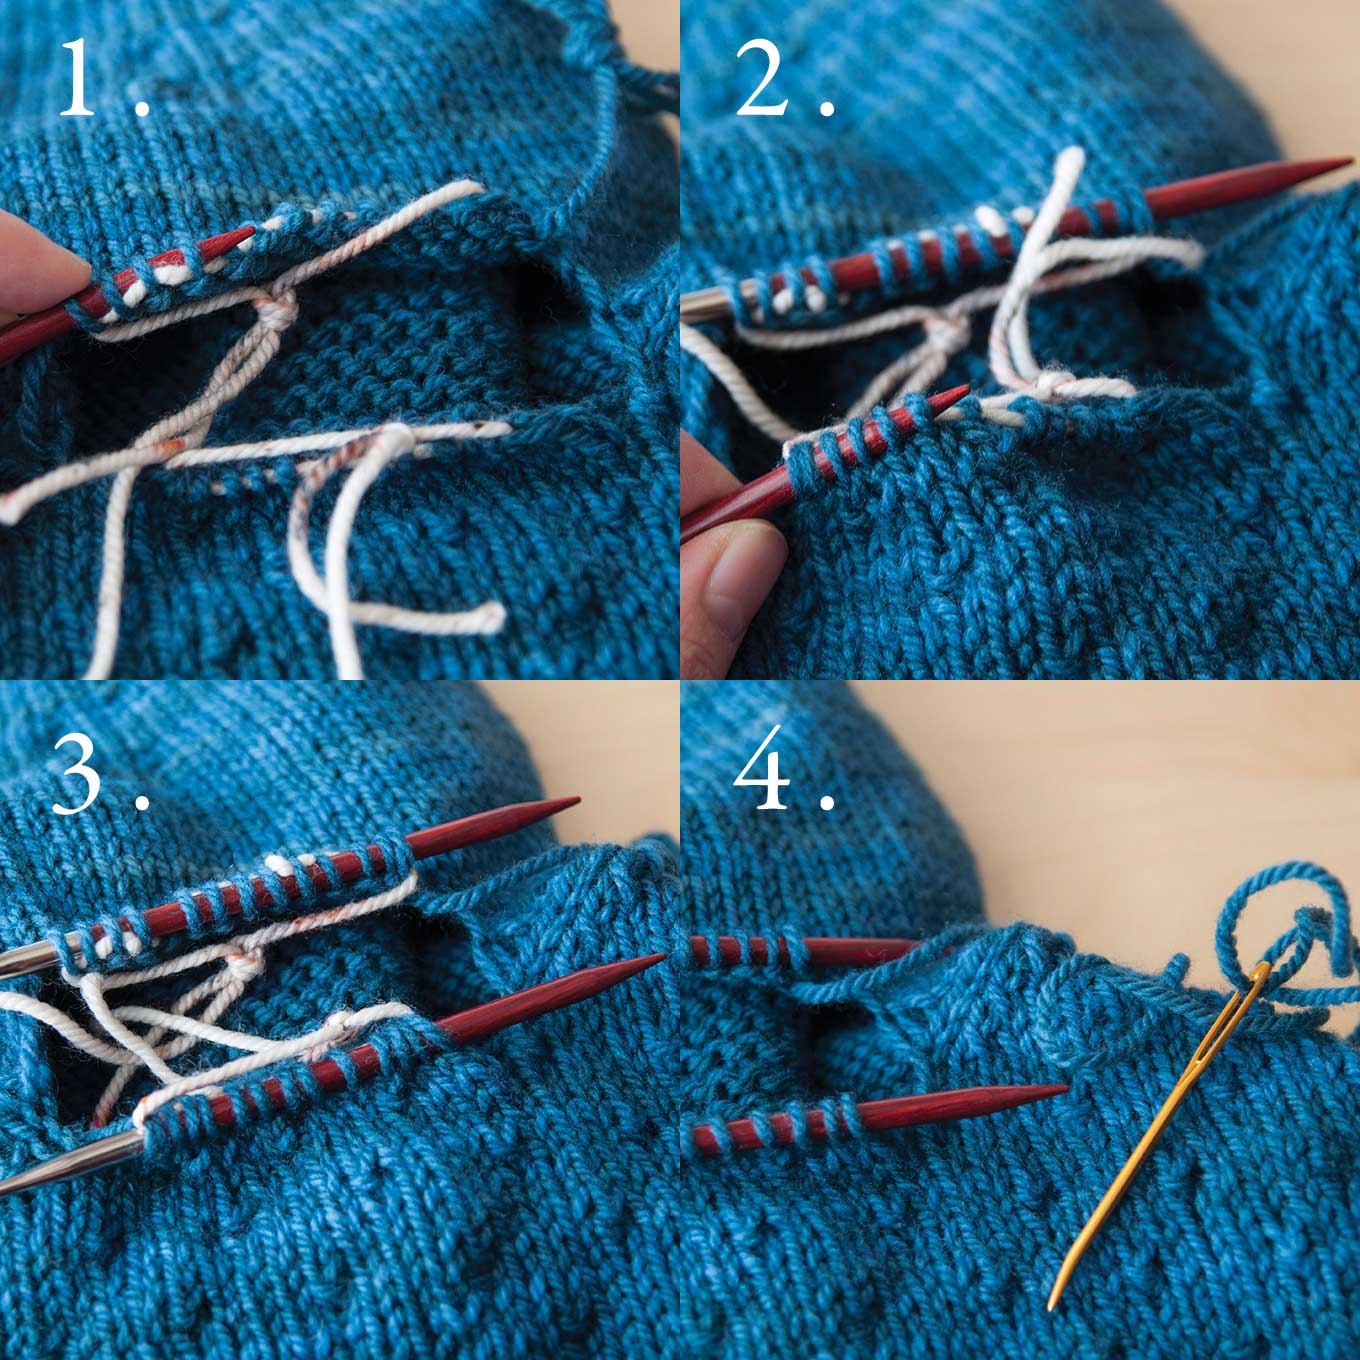
Place your held stitches back onto needles. I’m using a circular needle here, so I want to thread it through the stitches with the points towards the end of the gap with the tail (the right). If you use double pointed needles here, it doesn’t really matter which direction you put them in, because you can knit off either end! Once your stitches are back on the needles (fig. 3), carefully open the scrap yarn and pull it out of the stitches. Thread the tail onto a tapestry needle – I love the bent tip ones for this (fig. 4).
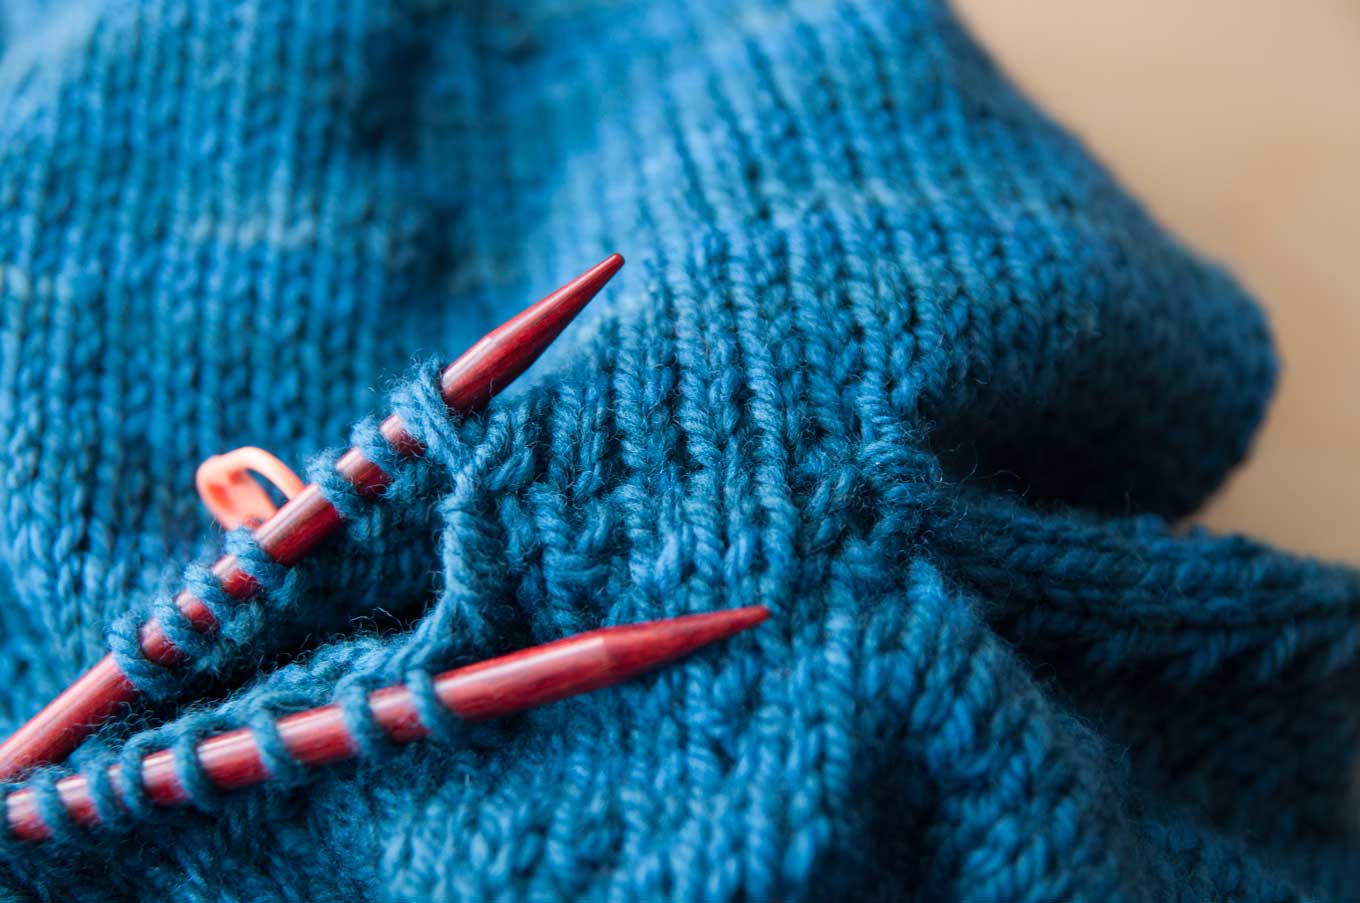
Right Side Gap
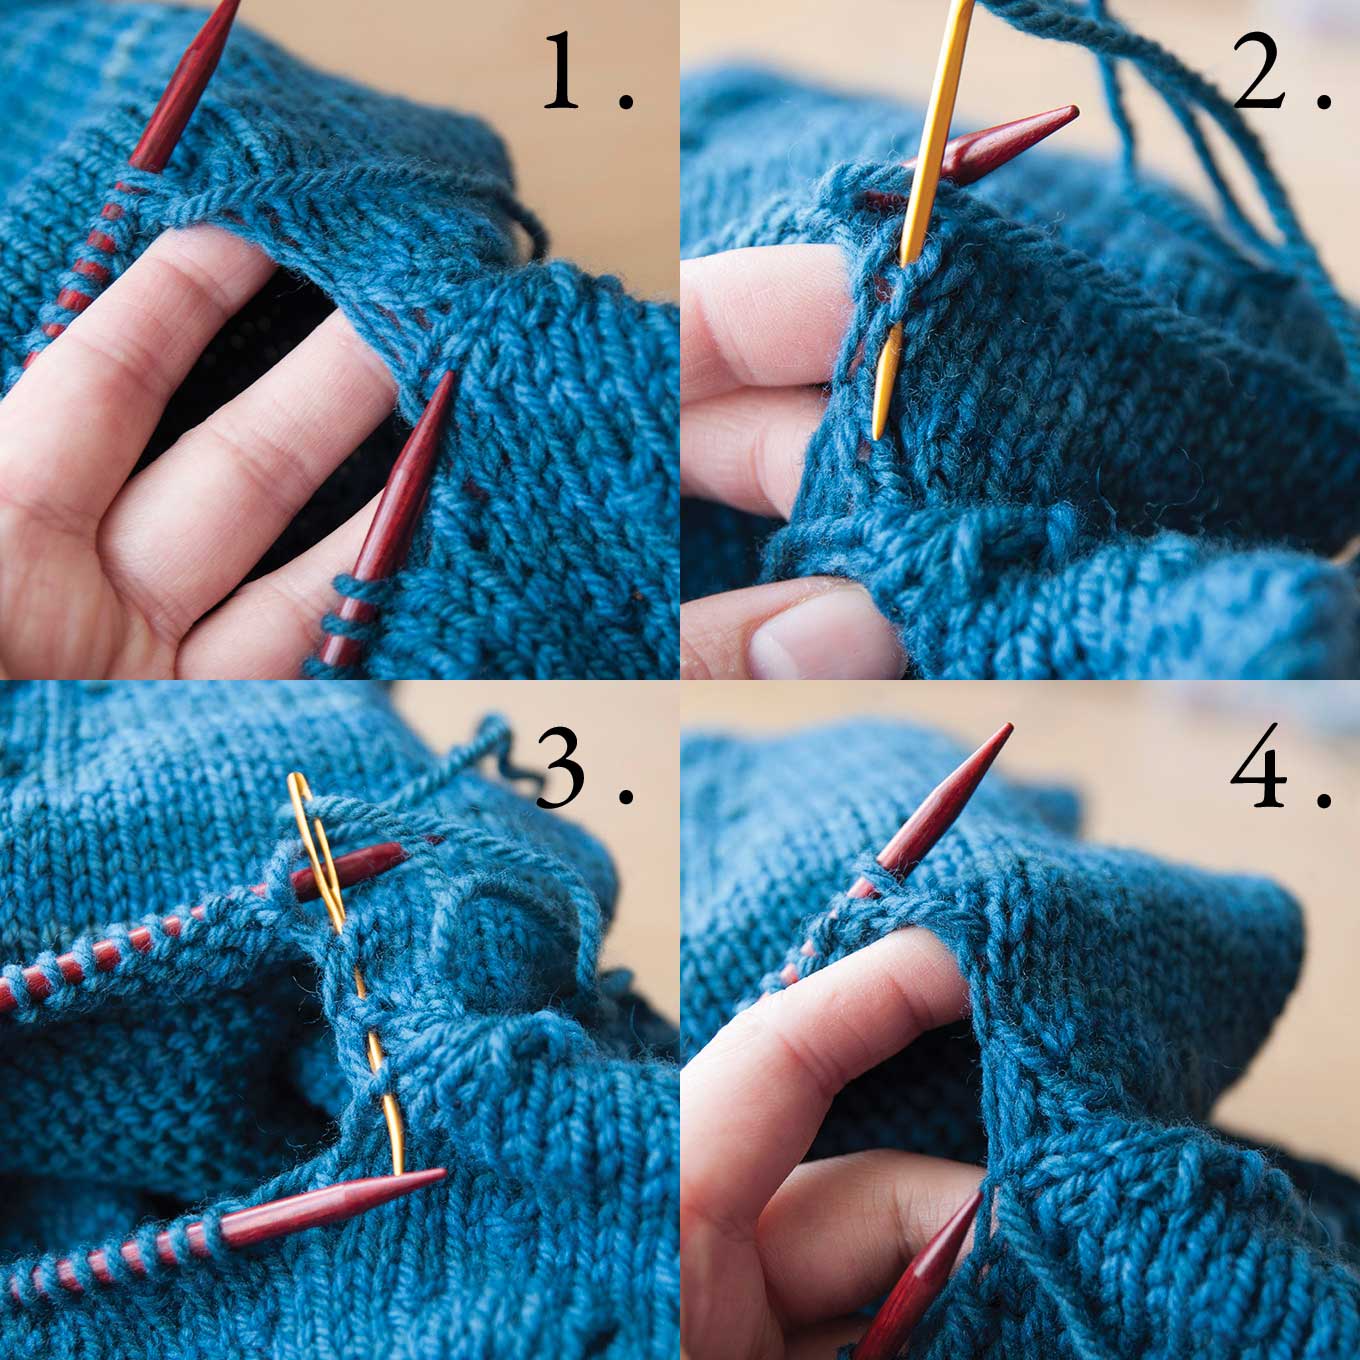
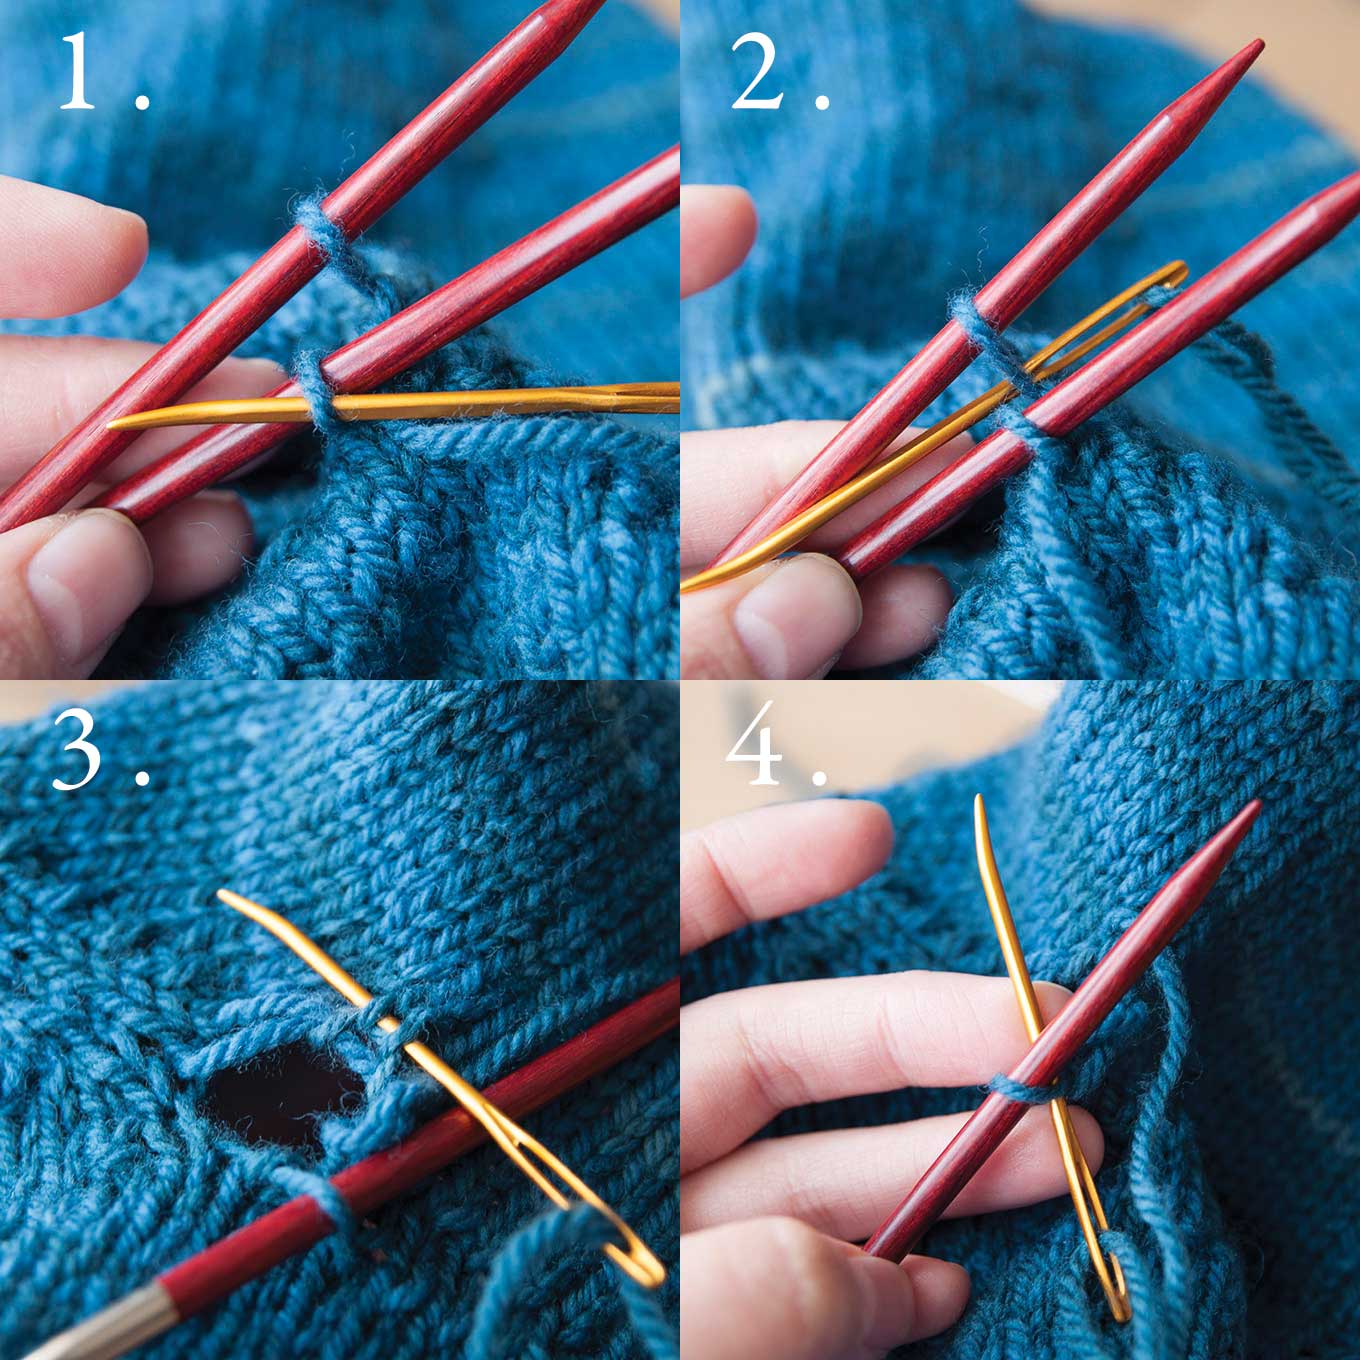
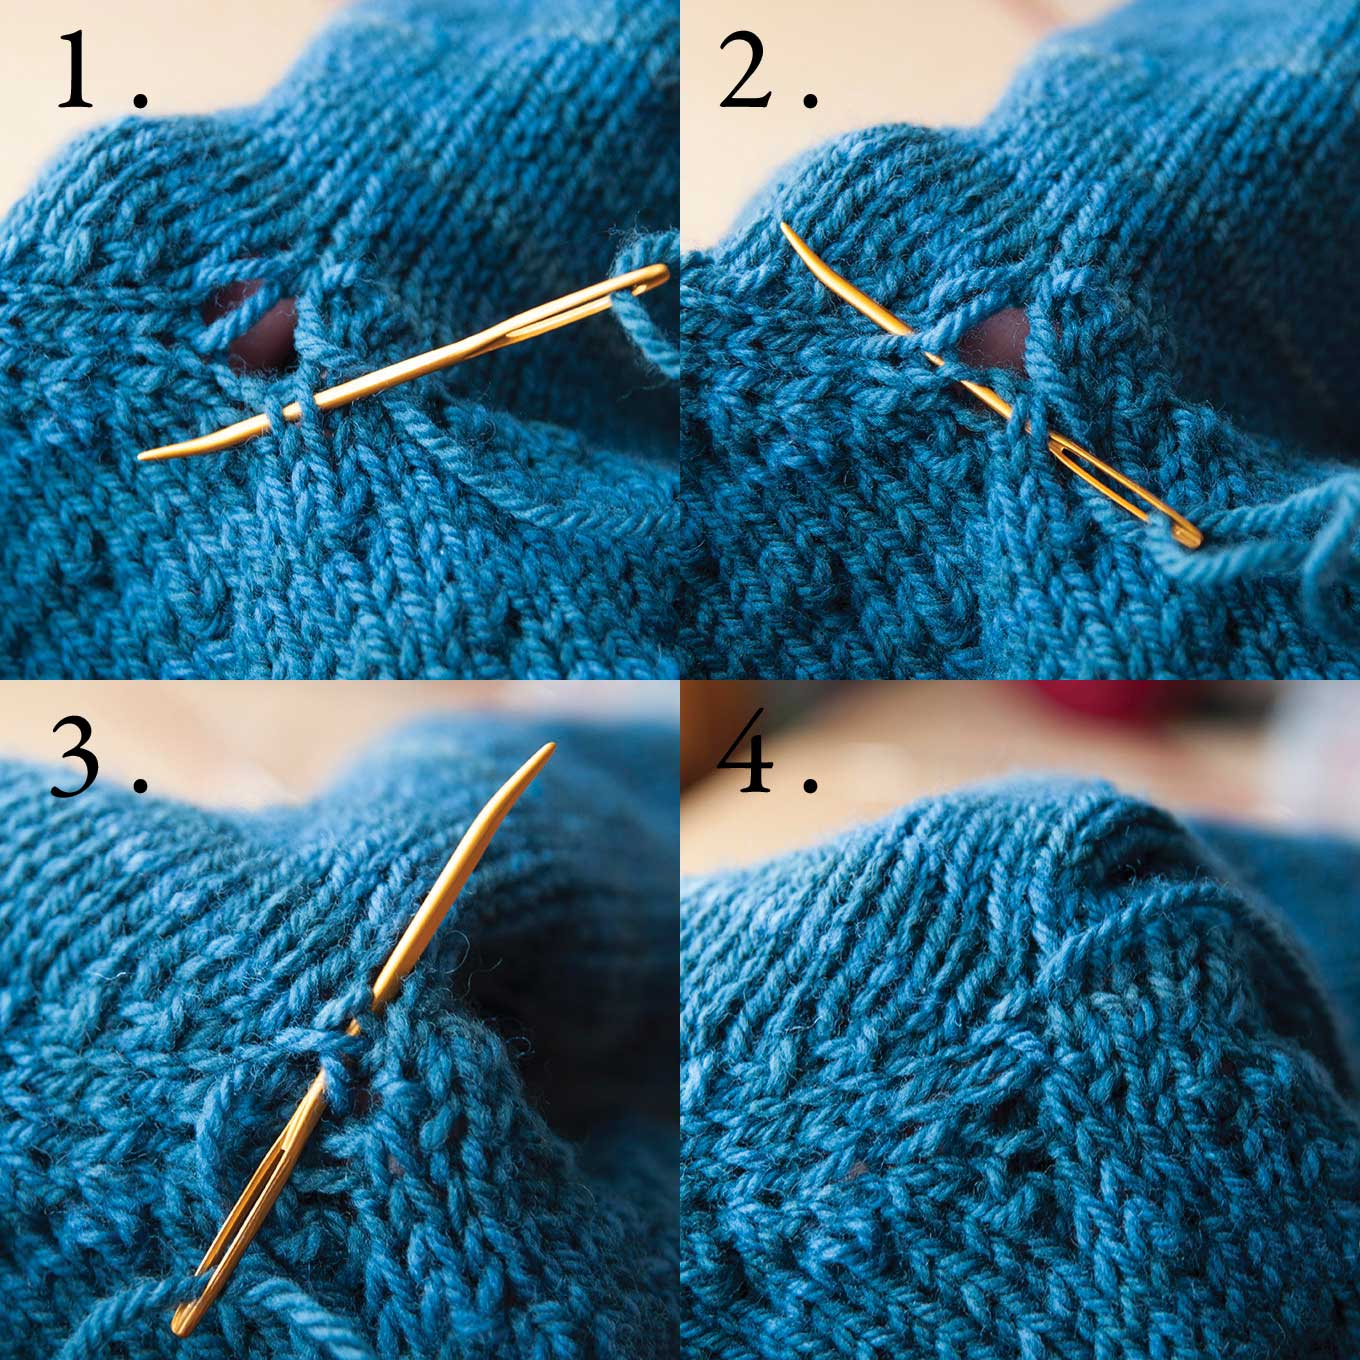
Figure 1 shows how large the gap is at the edge, between the two sets of gusset stitches. If you skip this area and just start grafting, you will indeed end up with a hole here! And since the tail of yarn is attached to the knitting already, you wouldn’t have a convenient piece to close the hole with afterwards. So I’m going to thread the tapestry needle in and out along this edge (fig. 2 and 3) to gather it up. In figure 4 you can see that I’ve pulled the tapestry needle through and you can’t even really see the yarn I’ve woven in there!
Here’s the last little bit that I’m gathering up before starting the actual Kitchener stitch.
Kitchener Stitch
Note: This is the way I’ve always done my Kitchener stitch – I think I learned it from Sally Melville’s The Knit Stitch book back in the day (haha, maybe 10 years ago). The rhythm of this set up sticks well in my mind, and I don’t ever have to look it up now. I close sock toes the same way.

Ready to Kitchener stitch those two sets of gusset stitches together!
Figure 1. Insert the tapestry needle into the stitch on the front needle, as if to purl. Leave it on the needle.
Figure 2. Insert the tapestry needle into the stitch on the back needle, as if to purl. Remove this stitch from the needle (fig. 3).
Figure 4. Insert the tapestry needle into the stitch on the back needle, as if to knit. Leave it on the needle.
Figure 5. Insert the tapestry needle into the stitch on the front needle, as if to knit. Remove this stitch from the needle.
Figure 6 shows what the grafting stitches look like before you tighten them up.
Here’s about half of the grafting done. Snug up the yarn as you graft, but don’t pull it too tightly or it’ll cinch in the fabric – we’re going for nice and smooth, matching the tension of the knitted fabric.
Here’s the shorter way I remember the steps of Kitchener stitch:
Front, purl, on; back, purl, off.
Back, knit, on; front, knit, off.
The Last Couple Stitches
Here are the last pair of stitches – one on each needle. How do you finish this off? Go into the front stitch purlwise and leave it on as usual (fig. 1), then into the back stitch purlwise (fig. 2). Remove this stitch from the back needle, then insert your tapestry needle under both legs of the next stitch in the fabric (fig. 3). Then go knitwise into the last stitch and remove it from the needle.
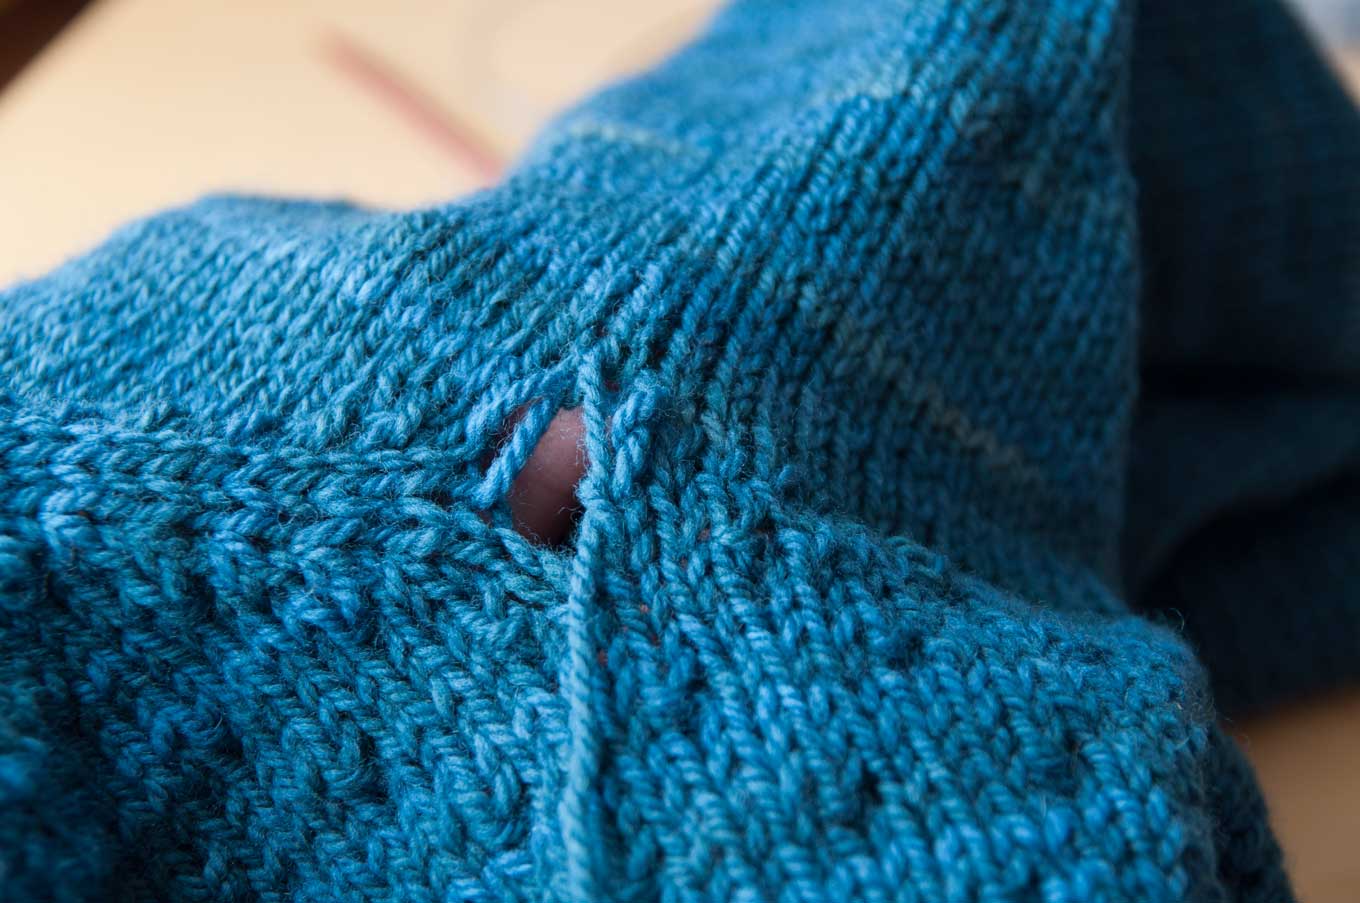
Here’s how it looks once the grafting is complete. Pretty good, but what about that hole?
Left Side Gap
You want to close the left side gap in a similar manner to the right side, by weaving the needle in and out of the fabric in a circle to gather it up (fig. 1-3). Pull it up tight and the gap is gone! Then you just need to bring the end to the inside and weave it in – if you’re still having gaps after all this, you can use this tail to help close it up even more on the inside.
Finished!
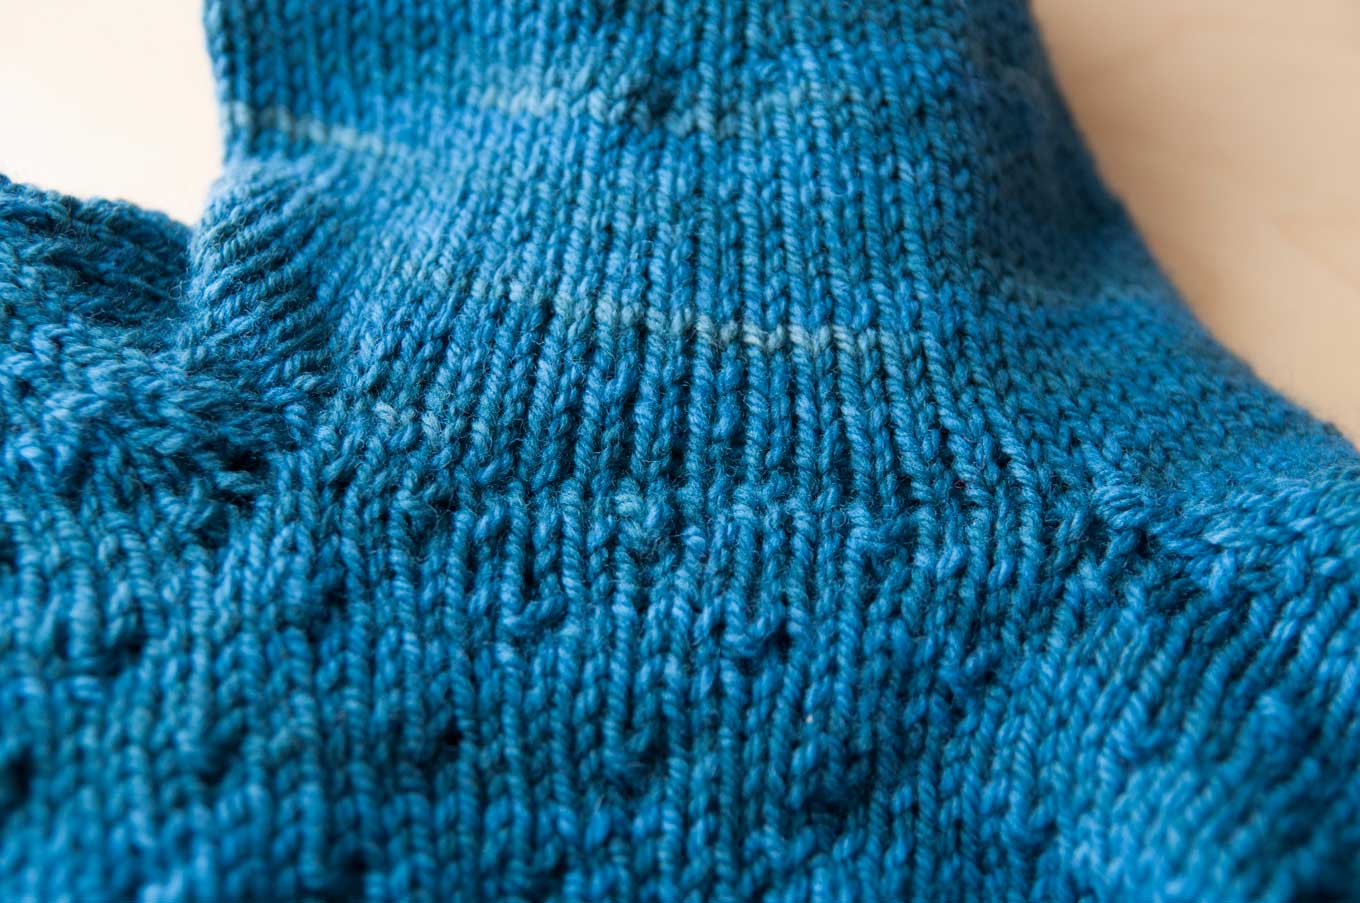
And we’re done! Grafting underarm stitches without holes or gaps takes a little bit of practice, but once you’ve gotten the hang of it, it’s really quite easy. I would love it if you share this tutorial – gapless underarm gussets for all!
Thanks so much to Stephanie from Dirty Water Dyeworks for the beautiful Targhee yarn that I used to design this sweater.
Leave a Reply to Marie Laplante Cancel reply